How to Protect Your WordPress Files and Directories Using .htaccess?
by
7-layers of Security for Your WordPress Site
Your website needs the most comprehensive security to protect it from the constant attacks it faces everyday.
The .htaccess file is a server configuration file supported by many web servers, including the most popular Apache web server software. This seemingly unassuming file is power packed with all kinds of functionalities and features, which if used correctly can very effectively define the way your web server processes requests. Learn how to restrict access to files and directories of WordPress using .htaccess file.
Apart from defining the way the web server processes requests, it is also very useful to protect your WordPress files from unauthorized access by hackers. In this article, we explore the many ways you can protect your WordPress files and directories using .htaccess.
[lwptoc]
1. How to protect your WordPress files and directories using .htaccess?
Let's explore some of the simple techniques you can employ to protect your WordPress files from prying eyes. Share on XBefore we go on to protect other files, let us start with protecting the .htaccess, first. However, as we always say, before making any changes (no matter how big or small they may be) always backup your site and in this case, save a couple of copies of your .htaccess file on your local system. This is to contain any damage that may arise from accidentally messing with the file.
i. Protecting the .htaccess file
The .htaccess file can be easily found in the web root folder public_html. There are two ways to access this file – using an FTP such as FileZilla or using the File Manager of your WordPress hosting account. In this article, we are using the File Manager to access the file and show you how you can secure it.
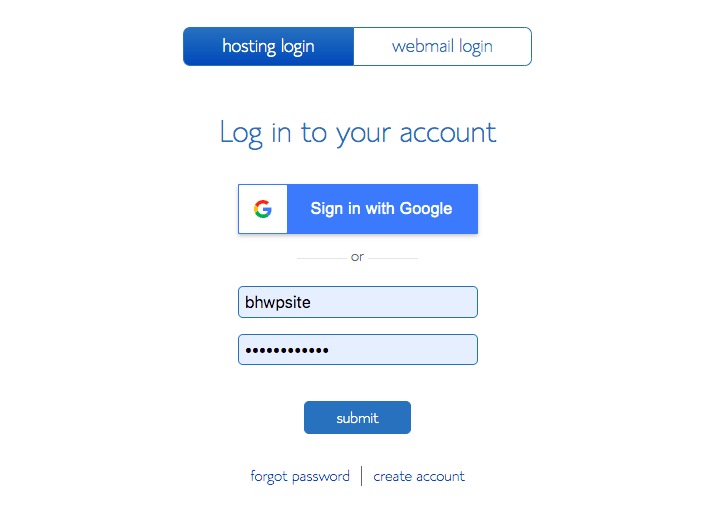
Step 1: Log into your web hosting account using your username and password. If you are unsure of your web hosting account credentials, refer to our guide.
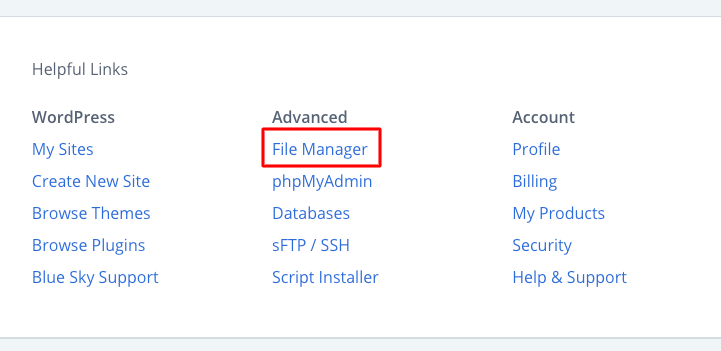
Step 2: Click on File Manager.
Step 3: Next, click on the public_html folder.
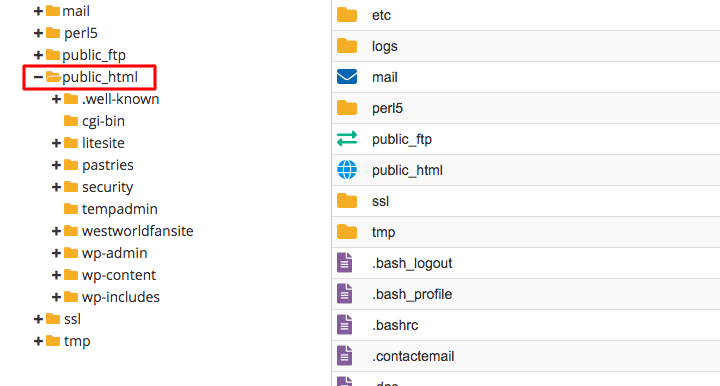
Step 4: Inside you will see the .htaccess file. Right-click on it. And choose the option to edit.
Once you access the file, place the following snippet of code in it.
# Deny access to .htaccess
<Files .htaccess>
Order allow,deny
Deny from all
</Files>
This is will restrict users from accessing your .htaccess file. Simple, isn’t it?
Now that we have secured the .htaccess file, it is time we move on to the others. So let us start with securing the wp-admin folder.
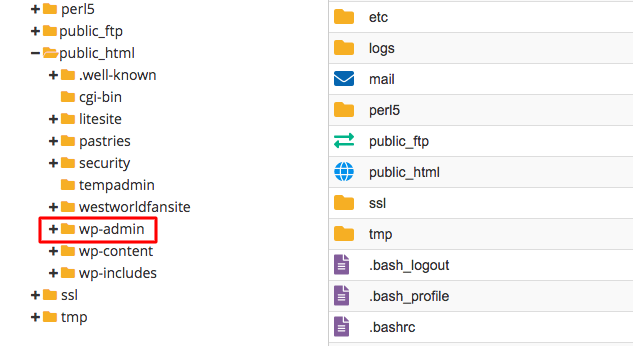
ii. Restrict access to the wp-admin folder using .htaccess
The wp-admin folder contains files that together power the admin tools. The admin.php file under this folder does the following functions:
- Enables connection to the database
- Displays WordPress dashboard
- Control the login page of your site
As you can see, the wp-admin directory is a very important one and care must be taken to protect it from unauthorized access. That’s because accessing the admin panel will allow the hacker to create havoc on your website. In order to do so, restrict user access to the WordPress admin folder using the .htaccess file. Allow access to specific IP addresses of your choosing. To do this, you would need to create a separate .htaccess file with a specific code (the one in the blue box below) and upload it to your wp-admin folder.
To create a new .htaccess file, simply open a new file in your default text editor and name it .htaccess. Not .htaccess.txt or .htaccess.doc or any other additional file extensions. Just plain .htaccess. Once you have done that, paste the following code in it.
# Limit logins and admin by IP
<Limit GET POST PUT>
order deny,allow
deny from all
allow from 12.34.56.78
</Limit>
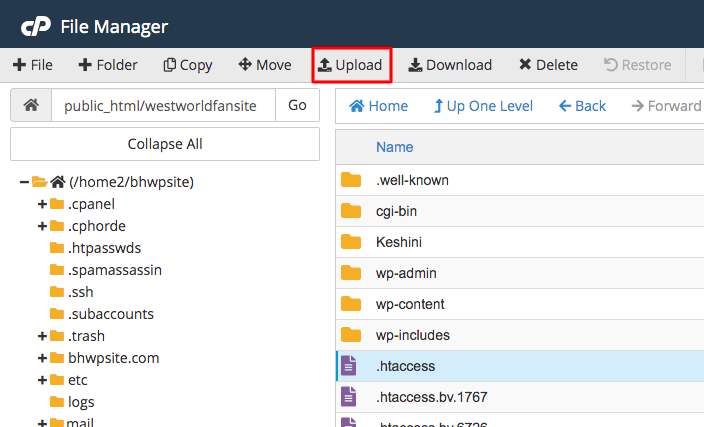
To upload the newly created .htaccess file to the wp-admin folder, log into your web host account and open file manager as shown below.
Once you click on File Manager, you can see all the files and folders in your site as shown below. Then click on the public_html folder.
Click on the wp-admin folder.
Then click on the upload button as shown before.
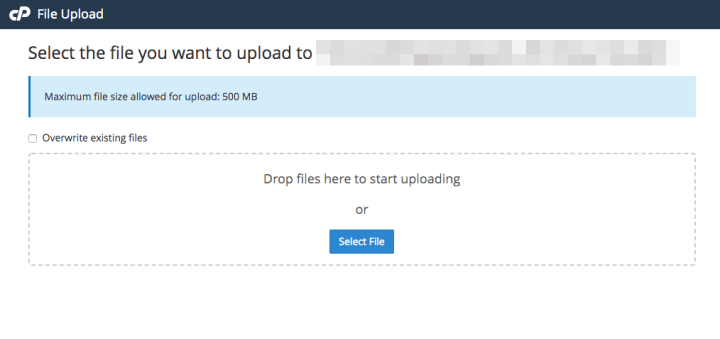
Select the .htaccess you just created on your local system and upload it in the window that opens.
Once you have uploaded the new .htaccess file, you are done! This new security measures will be restricting users, other than the ones you have explicitly given permission to, from accessing your admin panel.
Note that this will only restrict access to wp-admin and won’t restrict WordPress site access altogether. The wp-admin can still be accessed by registered users but that can also be limited by user roles. One can restrict permission to users so that not every registered user can access the folder.
iii. Block unauthorized access to wp-config.php
The wp-config file handles the WordPress’ base configurations and contains sensitive information about your WordPress installation such as MySQL settings, secret keys, WordPress database connection details, etc. Considering the critical nature of data this contains, utmost care must be taken to protect it from prying eyes.
The .htaccess file can come in handy to protect this very important file being accessed by a web user. In order to do so, all you need to do is copy the code given below into your .htaccess file.
As explained under ‘Protecting the .htaccess file’, access your .htaccess file from the File Manager and add the following code to it.
<files wp-config.php>
order allow,deny
deny from all
</files>
Once you have added the code given above, you will block unauthorized access to wp-config.php.
iv. How to block access to wp-content/uploads and disable pHp execution?
Many a time hackers leave the backdoor to access files on your site so that even if the hack is discovered and dealt with, they can gain easy site access in the future. These backdoor files are often disguised as WordPress files in the wp-includes or wp-content/uploads/ directories. And these are often .php files. In order to better secure your WordPress files and folders, you need to disable these sort of files from executing. This can help with your WordPress restrict access and that can be done by disabling PHP execution in these directories.
Disabling PHP execution using .htaccess is a very easy process if you follow our simple instructions to the T.
First of all, create a new .htaccess file in your text editor and add the following code to it.
<Files *.php>
deny from all
</Files>
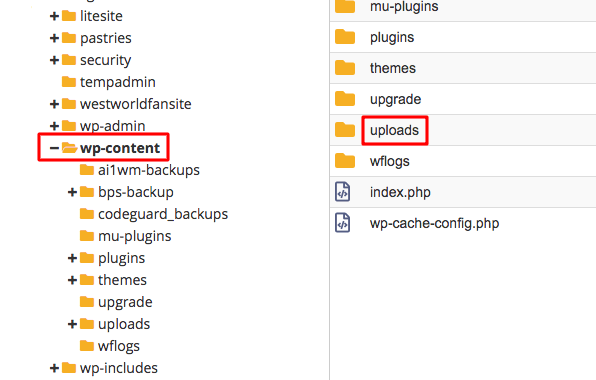
As a next step, log into your web hosting account and open your File Manager. In here, you get access to content and upload folder. Look for wp-content/upload/ folder.
Click on the Upload button and upload the newly created .htaccess file.
On clicking the Upload button, a new window will open that will allow you to select the .htaccess file from your local system.
Once you have uploaded the .htaccess file into the wp-content/upload/ folder, you have to add it to the wp-includes folder.
Similar to adding it to the wp-content/upload/ folder, open file manager to access the wp-includes folder from the Home directory of your site.
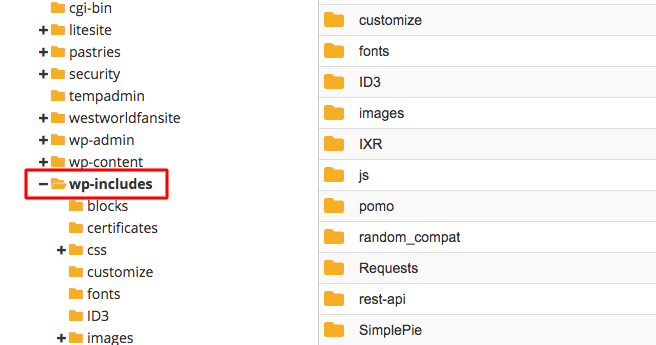
Click on the wp-includes folder and then click on the upload button.
Once you click on the upload button, you will be able to select a file from your local system. Select the .htaccess file that you just created and upload it.
Once you have added the .htaccess to both these very important folders, you have successfully disabled any PHP execution in these folders.
v. Disable directory browsing in WordPress using htaccess
Directory browsing is a feature wherein you see a list of files and folders, instead of a web page, when you try to access a website. For instance, you have a directory called private (as an example) on your website, say www.example.com. If directory browsing has not been disabled in this particular directory, then if someone were to type www.example.com/private/ they would be seeing all the files and folders under the directory private.
This can be disastrous for your site because this can offer a wealth of information to the scheming hacker. Who can then go on to plan an attack on your site armed with knowledge about your site file hierarchy? By disabling directory browsing in WordPress using htaccess, you’ll be limiting access level to your website.
In order to disable directory browsing for a specific directory, create a .htaccess file in your text editor and save it as .htaccess (without any additional file extensions). Then add the following code to it and restrict access to your WordPress files.
# disable directory browsing
Options All -Indexes
Once you have added the code, upload this newly created .htaccess file into the directory that you want to disable this feature for. As an example, if you want to disable directory browsing for the wp-includes folder, then upload this .htaccess file into the wp-includes folder as done previously via File Manager.
vi. Blocking specific IP addresses from accessing site
You would have noticed that certain users from certain IP addresses have been repeatedly spamming, launching hack attempts or simply trying to gain unauthorized user access to your WordPress site. You can completely thwart unauthorized WordPress user access by blocking his IP address from ever accessing your site using the .htaccess file. In order to do that, copy the code given below into your .htaccess file.
<Limit GET POST>
order allow,deny
deny from 123.456.78.9
allow from all
</Limit>
The IP address that is in the code above is just a dummy. You can substitute these values with the IP address that you wish to block. If instead of one, you have multiple ones, simply add each one separately in a line that looks like this:
deny from 213.546.87.9
If instead of a full IP address, you want to deny access to a block of IP addresses, simply omit the last of the octet as shown below.
deny from 213.546.87.9
This would block all IP addresses from 213.546.87.0 to 213.546.87.255.
If you accidentally blocked website admin or team members ip address, check out our guide on how to whitelist an ip address
vii. Blocking specific domains from accessing your site
You may not always be able to know the specific IP addresses that are spamming you. However, you may know that these attacks are coming from links posted on certain malicious domains. .htaccess allows you to block any visitor who has accessed your site from a link from such harmful sites.
To block a domain name, add the following code to your .htaccess file.
SetEnvIfNoCase Referer "badsite.com" bad_referer
Order Allow,Deny
Allow from ALL
Deny from env=bad_referer
In the code above, substitute ‘badsite’ with the domain you want to block. In doing so, whenever a user tries to access your site from the domain you have blocked, he will get an error message and won’t be able to access your site.
2. An alternative solution
While all the above solutions are effective to restrict access to files and directories in WordPress, it cannot be denied that it poses a great risk to your website. Why? Well, because you are fiddling with a very crucial configuration file. Even a misplaced dot can disrupt the functionality of your site! Scary, right?
Therefore, if you are not an expert, it is best to use a security plugin for WordPress website as it will help harden your website. A WordPress plugin called MalCare can take care of your site’s security aspects. Be it blacklisting specific IP addresses, implementing website hardening measures in place, protecting your login page, scanning for malware, or many such important security measures, MalCare does it all!
For complete website security solutions,
Try MalCare for free!
Category:
Share it:
You may also like
WordPress Nonce – All You Need To Know About It
Ever clicked a link on a site and gotten a confusing error message instead of the page you expected? Maybe you were trying to submit a form or delete a…

2 Simple Fixes For index.php File Corrupted on WordPress Site?
Dealing with broken links and jumbled pages is not fun, and it’s definitely not what you want your visitors to see. A corrupted index.php file is a common reason for…
How to Check if Google is Indexing My Site? – 4 Easy Methods
You just launched a shiny new site. You’ve put in hours crafting content and setting it all up. Now, you eagerly wait for it to appear in Google search results….
How can we help you?
If you’re worried that your website has been hacked, MalCare can help you quickly fix the issue and secure your site to prevent future hacks.

My site is hacked – Help me clean it
Clean your site with MalCare’s AntiVirus solution within minutes. It will remove all malware from your complete site. Guaranteed.

Secure my WordPress Site from hackers
MalCare’s 7-Layer Security Offers Complete Protection for Your Website. 300,000+ Websites Trust MalCare for Total Defence from Attacks.